Blue Apron Review

Last week I got to try Blue Apron with a friend’s referral code. I’ve had a few friends use Blue Apron in the past, and I’ve been curious about it for a while. Overall, it was a great experience, but I chose not to continue it.  I do have some mixed thoughts on the product, and I thought I’d share them in case anyone else is considering Blue Apron for themselves.

What I Liked About Blue Apron

1. Meal-Based Recipes

One thing I really, really liked about Blue Apron is the meal-based format of their recipes. When you’re cooking on a time crunch or don’t have a lot of experience, it’s nice to know how to pace multiple dishes to be done at the same time. From doing prep all at once to timing each step correctly to make sure everything comes together simultaneously, Blue Apron’s recipes do a pretty good job of creating meals, not just dishes. I would still recommend that you read through the entire recipe before you start — there are a few “prep” things that are placed halfway through the cooking process that I’d prefer to do at the before I start heating anything up.

2. Tasty Recipes and High-Quality Ingredients

The ingredients were fresh and high-quality. I was worried that the produce would be subpar, since I wasn’t sure what the delivery process looked like, but everything was of a quality I would have bought if I had gone to the store and picked it out myself.

Every single recipe was delicious, and I’m sure I’ll make them again. Blue Apron has done a great job developing recipes that are well-balanced and flavorful. They were healthy; not necessarily the kind of food I’d eat if I were trying to lose weight, but not too heavy. There was a good mix of whole, fresh ingredients that weren’t overly salty, fatty or cholesterol-laden.

3. Convenience

They bring the box right to your door! It’s packed with large ice packs and well-organized. As I unpacked, I realized that the pork chop packaging had been torn during shipping, but because of the way everything was packed it didn’t leak on anything except the ice pack. I usually spend a good amount of time deciding what to cook and shopping for ingredients each week, but with Blue Apron I didn’t have to. It was a nice break from the norm, and I can see how having everything delivered ready-to-cook would be a huge boon to busy individuals or families.

What I Didn’t Like about Blue Apron

1. Not enough cooking jargon

On one hand,  jargon can be alienating and confusing. On the other hand — the hand you’re learning to cook with — it’s an important way to describe techniques, and most recipes use some level of lingo. Blue Apron recipes tend to eliminate these cooking words in favor of simpler ones. One of the recipes called for quick-pickled onions, but the word “pickled” strangely didn’t appear anywhere on the recipe. The technique was there, (soaking sliced onions in red wine vinegar), but without the jargon or outside knowledge, you wouldn’t necessarily know that. Understanding the language and the techniques behind them are an important part of learning to cook.

2. Portion Size

While the dishes weren’t meager, I did find myself wishing I had a little extra each night. I usually cook relatively large portions for myself and my boyfriend so that we either have leftovers for lunch or a second helping. I supplemented all but one of the meals with a secondary side dish, to make sure we didn’t get hungry later, and it seemed liked just enough food. That said, if you don’t have quite a big eater at the table, you’ll probably find Blue Apron’s portions to be just right.

3. Packaging Waste

One of the biggest problems I saw with Blue Apron was the amount of packaging it involved. Any ingredient that wasn’t whole and somewhat shelf-stable was packaged in small plastic cups or bags. I appreciate the fact that finding cheap, tough, lightweight alternative packaging solutions can be tough. However, I try to minimize kitchen waste wherever possible. This means purchasing larger quantities and opting for products with less packaging wherever I can. I’m sure Blue Apron is working to improve their packaging, but their current model doesn’t align with my waste goals.

One thing that I won’t put in either the pro or con column is cost. At nearly $60 per week, Blue Apron more expensive than going to the store and buying everything yourself, but cheaper than ordering in or going out to eat. Given the fact that it’s also delivered to your door, the cost markup doesn’t seem terrible.  You’ll have to figure out for yourself if the pros outweigh the cons (and the price) for Blue Apron.

In the end, I think that Blue Apron is a great solution for cooks who have a small to moderate amount of cooking experience already. If you’ve never picked up a knife before, you might get a little lost in Blue Apron’s recipes, but if you have a basic understanding of getting around the kitchen you’ll probably enjoy their meals. The meal choices were solid and interesting, and if you’re stuck in a creativity rut cooking the same things over and over, Blue Apron might get you out of your comfort zone and introduce you to some new ingredients and ideas. If anyone else out there has tried and liked (or disliked) Blue Apron, I’d love to hear your thoughts!

Please note: I was not paid to review Blue Apron, although I did receive a free box via a friend’s referral code. My thoughts on my experience with their service and product are entirely my own. 

On Keeping a Cooking Journal

Follow my blog with Bloglovin

Keeping a cooking journal is a small but effective technique for improving your cooking practice. I’ve only started doing in the past year, but since I started I’ve found myself wishing I had begun years ago. It’s something I highly suggest that other home chefs do too because it can have a big positive impact on the learning process.

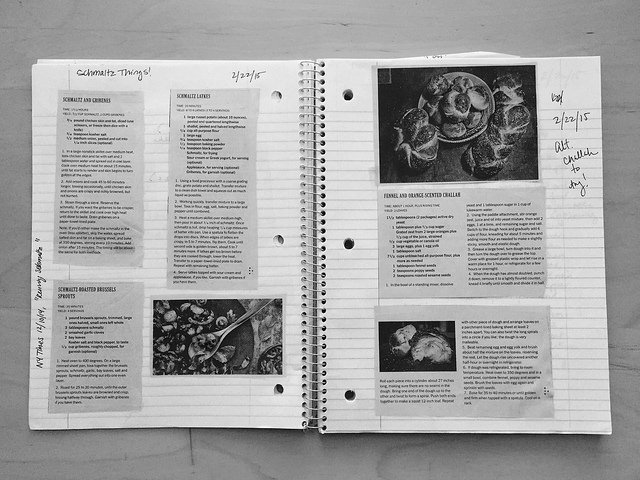
cooking journal with recipe

Why a Cooking Journal is Important

A cooking journal is simply a place for you to take notes about your cooking projects. And just like in school, the notes you take about cooking help you process and retain a lot more information than you would otherwise. As you cook more frequently, you likely find yourself pulling recipes from many different sources. You’ll probably mix together elements of different recipes to make your own version. You might even strike out and play with original concoctions. And when you do make that perfect pancake, or discover your new twist on an old childhood favorite, you’ll want to make sure that you can replicate it. Taking notes on where you find your inspiration, how you tweak recipes and what you liked (or disliked) about a dish helps ensure that good cooking isn’t a lucky chance, but a measured process that you can recreate next time. Keeping a cooking journal will save you time and energy down the line by helping to focus your cooking process and make you more conscious of past successes and failures.

How to Use a Cooking Journal

Get a cheap spiral notebook and leave it in your kitchen, or use an app like Evernote if you want to keep things digital. Don’t worry too much about using something too fancy or complicated; function is much more important than form in this case. If you’re using a paper notebook, it’s likely that at some point it’ll end up with a dusting of flour or a few rogue drops of olive oil on the cover, anyway.

cooking journal harissa

Write down what you cook– everything you cook. If possible, jot down notes as you go, or soon after you’re finished and your memory is fresh.

If you’re the organized type, it can be helpful to provide a bit of structure to your journal. If you’re using a notetaking app you might want to sort it into folders for different categories of dishes (meat, desserts, veggies, etc). If you’re using a hardcopy journal you can use Post-it notes to color code important pages.

What Do I Include in my Journal?

Just like a regular journal, you can put whatever you want into a cooking journal. If you want to draw diagrams of how to chop an onion, compose odes to the perfect cheeseburger, or write down the precise temperature and weight of every ingredient you use, you can. Sometimes I’ll even cut out and tape in recipes I find in magazines or the newspaper and want to try. Other times I’ll just write a few notes about ideas for different flavor combos for my next batch of cupcakes.

The key thing to remember is that the purpose of the journal is to help you improve in the future, so try to include notes that will help you the next time you make a dish. When you’re experimenting with a new mix of spices, keep track of what you’re putting in the mix so you can replicate or improve it the next time around. When you’re trying a new technique, write down what you did, where you messed up, and how you can do it better.

cooking journal two pages

The Secret to Good Journaling: Going Back!

The most important part of keeping a cooking journal is going back and reviewing what you’ve written. When you’re preparing to make a dish that you’ve already made before, refer to the notes you took the first time. Try to improve your process slightly (or significantly). Going back and making recipes again is a critical part of improving your skills, and having notes from the last time you made something is a great way to jump start your efforts.

It’s also fun to take time, every once in a while, to go back and flip through the early pages of your cooking journal. Looking back can help you realize how far you come, and help motivate you to be even more adventurous in the future. Happy journaling!

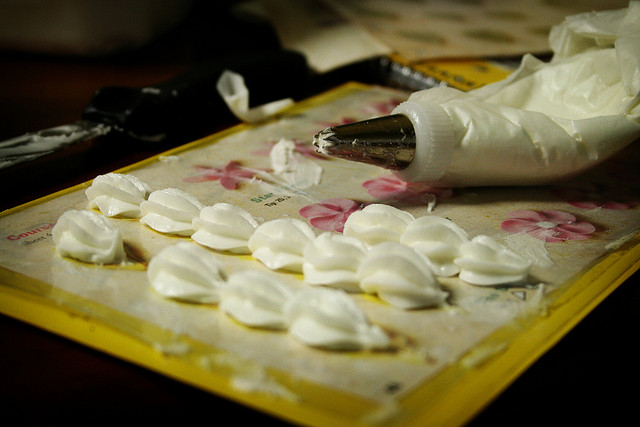
"Icing Practice" by Ginnerobot via Flickr

The Importance of Smart Practice: When Practice Doesn’t Make Perfect

Back in January, I decided to jump start my blogging and hone my kitchen skills by baking my way through Peter Reinhart’s The Bread Baker’s ApprenticeI’ve been baking bread for a long time now. Back in college my diet consisted of more peanut butter sandwiches on homemade bread than I care to remember. I love fresh, warm bread and one of my favorite childhood memories was baking big, brick-shaped loaves in a bread maker in my parents’ kitchen. The basic concept of measuring ingredients, kneading dough, then shaping and baking it isn’t a new one for me. But up until lately, my bread-making skills had been stagnant for a long time. Sure, I’ve baked a lot of loaves, but for a while noticed that my bread kept turning out more or less the same, and I didn’t see any progress towards the bakery-level quality I would like to achieve. I was practicing a lot, but I wasn’t getting any better.

Starting a weekly bread baking practice has improved my baking skills by leaps and bounds in the past few months. And while the frequency with which I bake has certainly been a factor in my improvement, there’s a more critical reason that my bread quality has improved so much lately: I’ve been practicing smarter.

A Study in Ciabatta: Why Practicing Well is Critical

I’ll admit that I’ve been baking most of Reinhart’s recipes only once each this year. While I plan to circle back to remake many of my favorites, blogging about the same recipe week in and week out would get tedious, and I’d prefer test my skills in lots of different ways this year. I also don’t want my roommates to hold a carb intervention after I serve up the same loaf of bread the 30th week in a row.

Ciabatta has been one notable exception, and it’s the perfect example of what good practice looks like. The first time I baked ciabatta, I made two loaves — one spiked with mushrooms, the other plain — and wrote a post about it. Reinhart’s ciabatta recipe is simple formula that relies on good ingredients and confident dough-handling to make a great loaf. I thought my first loaves turned out pretty well. They were soft and tasty. But they weren’t quite like the ciabatta I knew from bakeries. Check out the crumb texture here:

ciabatta crumb

There aren’t any big holes! One of the trademarks of traditional ciabatta is an open, holey texture. My bread was delicious, and would have made a great sandwich bread or burger bun, but it wasn’t quite what I had aimed for.

Trying Again: Identifying Weak Points

After my first attempt, I reviewed the recipe (Reinhart includes fantastic baking notes in his books, I’m just too much of a scrub to internalize them very well the first time around) and compared it to a few more ciabatta recipes online. A tight crumb was my main problem. I determined that I was either deflating my dough too much and pushing the air bubbles out during the shaping, or adding too much flour and making the dough too dense and stiff to develop proper bubbles in the first place. You can see how dry my first batch of dough looked:

ciabatta - folded

Notes on my shortcomings duly made, I knew what to try harder at during my next attempt. The week after I made my first ciabatta, I made another batch for a small dinner party that I cooked for. This time I tried to correct for the tight crumb of my first loaf by keeping the dough wetter during proofing. Dry dough is easier to handle, so it’s tempting to overflour and make kneading and shaping easier. I had to actively resist the temptation to do so this time. And as a result, ciabatta #2 had a much better texture in the end. Compare this wetter dough to the one above:

wet ciabatta dough

The resulting loaf was better, but still not perfect — it had more holes, but was a little too dense. I was still overhandling the dough while I was shaping it. But this was a good thing! I had correctly identified my main problems and was making progress towards correcting them. Most importantly, I knew what to do to make my bread even better.

And Again: Mastering the Technique

I had friends over for dinner a few weeks later and decided to make the ciabatta one more time. This time I let the dough stay very wet and loose. I was also extremely careful not to deflate the dough whenever I was handling it.  It was a messy, sticky ordeal, but the results were worth a bit of frustration. Finally, my bread was full of nice, big pockets!

ciabatta with holes

Cooking Beyond Your Comfort Zone

The next time I make ciabatta, I’ll keep what I’ve learned in mind and be able to replicate or even improve my last results. The biggest lesson I learned during this exercise was that I need to stop trying to confine new recipes to my cooking comfort zone. I’m more accustomed to working with stiffer, drier bread dough, so I tried to force the ciabatta dough to conform to my preferences instead of the other way around.

Let yourself be uncomfortable with your cooking endeavors. Put your faith in trustworthy recipes and tried-and-true techniques. Add a bit more butter than you think you should if your dish is turning out too dry, or throw in a little “too much” spice if it doesn’t have enough flavor.  Push each iteration of your new favorite recipe to be better than the last. Be patient, taste often, and don’t be afraid of messing up — that’s how you figure out how to make it better the next time around.

How to Practice Smarter Cooking

Practicing the same recipes over and over with the explicit intention to improve your results each time helps improve your cooking repertoire rather than just expand it. Having a library of recipes and techniques you can prepare confidently and consistently helps you gauge your progress in a measurable way, and allows you to see how all of those techniques you’ve mastered fit together into a variety of different dishes. Plus, once you’ve gotten tweaked and tested a couple of recipes to perfection, you can make them without a lot of thought, which lets you play around with variations and have more fun with them.

To get started, find three dishes that you love and resolve to cook each of them at least five times. Every time you make the dish, think about (or even better: write down) what you did well and what you could have done better. Did it look the way you expected it to look? Did it taste different from what you anticipated? The next time you make it, actively try to address at least one problem you’re having with the dish. Bit by bit, each dish will get better every time.


Featured photo by Ginnerobot via Flickr

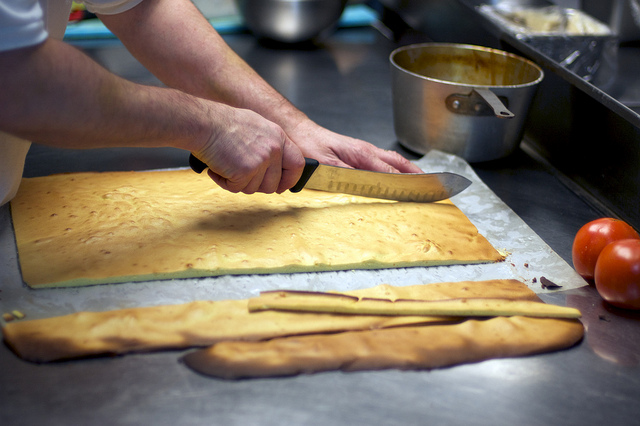
Image by Jeff Kubina via Flickr

How to Be a Better Cook at Home: Learn Techniques, Not Recipes


One of the biggest mistakes made by fledgling home cooks is worrying too much about following recipes instead of learning techniques. They trudge through Step 1, Step 2, and Step 3, following the instructions to the letter, trying not to deviate from the recipe, but not really thinking about anything beyond exactly what’s written. Onions get chopped unevenly, stove top burners get cranked up too high, herbs get forgotten in the back of the fridge until the last possible minute. These cooks will finish the dish, and it might still be tasty , but cooking like this doesn’t teach you much, and poor practice doesn’t make perfect in the long run. If you’re cooking like this, you’re just following with recipes, when you should be working on improving the skills and techniques.

Learning the Key: Why Techniques Work Better

Of course, recipes and techniques aren’t really mutually exclusive; a recipe is just a combination of techniques and ingredients put together in a certain way to get a certain result. But here’s the difference: recipes can suck. Right now the internet is glutted with a huge range of recipes — some good, some bad, many in the middle — written by everyone from professional chefs to web-savvy grandmas. A theoretically delicious dish can be brought to its knees by a poorly written recipe in the hands of a novice cook.

Recipes can be unclear, confusing, poorly written, or simply written for more experienced cooks.

A technique can’t suck, in itself. A technique is just the action — searing, braising, chopping, mixing, etc. And improving your skills at performing a given technique can help overcome the strictures of a sub-par recipe.

Understanding what techniques you’re using and how to do them well opens up a whole world of variation to you that can correct for crappy recipe notes and allow you to improvise, experiment, and generally get better over time. It’s the difference between memorizing a specific piece of music in C minor, and understanding what playing in the key of C minor involves. Once you learn the key, then playing (and even composing) other songs in the same key becomes infinitely easier .

Mindful Cooking: Putting Techniques to Practice

Every time you make a new dish you’re probably going to encounter something new, or a new variation on the same concept. Next time you pull out the pots and pans to attempt a new recipe, ask yourself what techniques you’ll be using, step by step. By learning the basic concepts and practicing them, you can make a big difference in your cooking skills in the long run.

Figure out the techniques you use most frequently, and then try to perfect them.

Say you’ve decided to try your hand at beef bourguignon for dinner this Saturday night. While it’s can seem like a rather daunting dish for beginners, it’s a bit easier if you think of it terms of the building blocks of the dish: trimming the beef and vegetables before they’re added in turn; searing cubes of beef; sauteing onions to just the right level translucency. After you’ve finished your deliciously well-executed beef bourguignon, look for more recipes that use similar techniques to hone your skills even further. Mastering each of these is a small, manageable skill that can be applied to countless other recipes in the future.

The meta skills inherent to cooking are also good to think about. Keeping a clean, efficient work area and timing the stew so it’s ready at the same time as the other dishes you’re serving it with can be just as important to becoming a good chef as working with the ingredients themselves. Thinking about the different elements of a recipe’s process is key when it comes to cooking well.

Building Your Technical Cooking Repertoire

For a lot of people, especially those who are teaching themselves to cook and don’t have the benefit of an in-house mom, grandma or pro chef roommate to lean on, learning what’s going on at a chemical or physical level when you use given technique can be a useful method. Scientific chef-extraordinaire Alton Brown and Serious Eats’ J. Kenji Lopez-Alt both do a great job of walking through the specifics of different cooking techniques. Reading or watching some materials about general cooking processes and different methods can help you understand what to look for while you’re cooking — for instance, why you need to let a loaf of bread cool before you slice into it. Ultimately, knowing why and not just how can help improve your techniques through deeper understanding.

As with with any other technical skill, practicing is what makes you better. Practicing with technique in mind prevents you from getting stuck with the same old recipe over and over — instead of making a hundred batches of simple French bread to practice your kneading, you can find a new recipe every time (or every few times) to prevent yourself from getting taste bud burn out. So get out there and start practicing!

Image by Jeff Kubina via Flickr