Year of Bread: Garlic Herb Focaccia

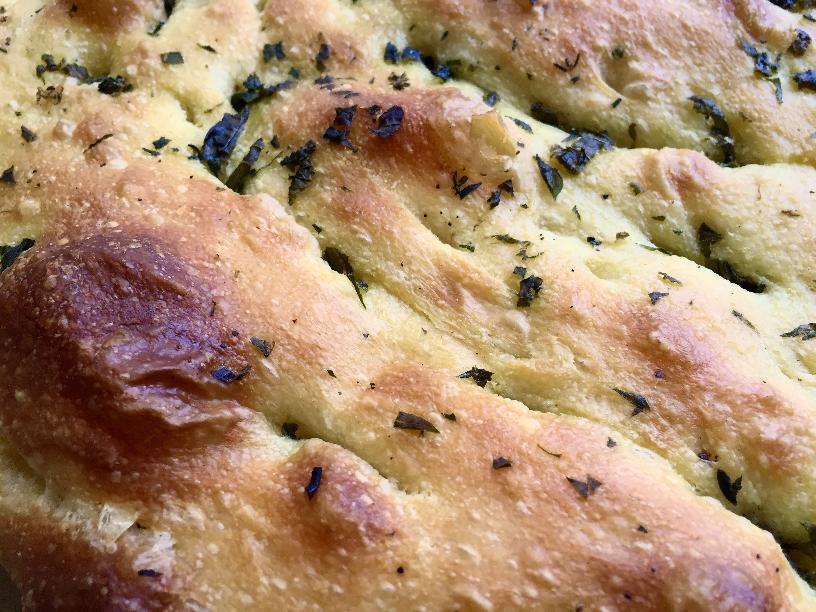
Focaccia is the fun cousin of ciabatta; it has a wet, long-fermenting dough that bakes up to a light, somewhat flat but very bubbly bread — plus a healthy dose of herb-infused olive oil. It doesn’t look neat and tidy, but bakes into a landscape of olive-oil filled valleys and air bubble peaks. Flavor-wise, focaccia plays second fiddle to no one. It’s great for dipping in oils and sauces, but it’s baked with so much rich olive oil flavor that it holds its own as well. Olive oil plays a huge part in making this focaccia recipe great. A healthy coating pools in the divots on the top side of the bread, and runs down the sides and sizzles underneath during baking for a thick, crispy bottom crust. If you’re looking for a great base for a deep dish pizza crust, this might be the perfect recipe.

focaccia2

A Slow Fermentation Masterpiece

This focaccia feels like the epitome of Reinhart’s slow fermentation baking philosophy. Be forewarned that a significant amount of proofing time is required on both days of the bread’s preparation.When all is accounted for, it requires a bit over 5 hours of room temperature proofing and a long night in the refrigerator. The time it takes for the dough to reach bubbly perfection is worth it, however; the final product has a fantastically complex taste and really lets the flavor of the yeast stand out. Much like ciabatta, a very wet poolish-style starter is the foundation of this loaf. In this case, the poolish is all that’s used, as no other ingredients are added on day 2.

Any number of toppings can be used to dress up this loaf, but I used a simple olive oil infused with herbs and garlic. I found that an extra sprinkling of salt over the top of the focaccia after baking immensely improved the overall balance of the flavor. I had a really hard time leaving the fresh, warm slices alone long enough to take photos.

focaccia1

Focaccia with Basil Garlic Oil

Yields one very large focaccia loaf. Slightly adapted from Peter Reinhart’s The Bread Baker’s Apprentice

Focaccia Ingredients

  • 5 cups (22.5 oz) bread flour
  • 2 tsp salt
  • 2 tsp instant yeast
  • 6 T olive oil
  • 2 cups water, room temp
  • Extra olive oil for drizzling

Herb Oil Ingredients

  • 1/2 cup olive oil (doesn’t have to be extra virgin)
  • 1 large garlic clove, smashed
  • 2 T fresh basil leaves
  • 1 tsp fresh marjoram
  • 1 tsp fresh thyme
  • A few pinches each of salt and pepper

Note: Any combination of fresh herbs will do for this, depending on your flavor preference.

Instructions

  1. Preparing the Dough: The day before you want to bake the focaccia, assemble the dough. Stir together the flour, salt, and yeast in a large mixing bowl, then add the water and olive oil. Stir with a wooden spoon (or your hand) until the dough comes together. continue mixing or kneading for about 5 minutes. The dough should be smooth and loose, but not too sticky. It will stick to the bottom of the bowl, but should clear the sides as you mix.
  2. Sprinkle flour on a counter to make an 8×8-inch bed for the dough. Transfer the dough into the bed and dust liberally with flour, patting (as best you can– the dough will be very loose and uncooperative) into a rectangle. Wait 5 minutes for the dough to rest.
  3. Pulling the dough from either side, gently stretch it to about twice its length, then fold it over itself into thirds, as if you were folding a piece of paper to put in an envelope. Mist with spray oil and dust with flour, then cover with plastic wrap and let sit for 30 minutes.
  4. After 30 minutes, repeat process. Let sit again for 30 minutes.
  5. After the second 30 minute period, repeat the stretching one last time and then let sit for an hour. It won’t rise, but it will swell and spread significantly (Just to recap, that’s 3 “stretches” total).focaccia poolish
  6. Proceed with shaping; line a baking sheet with parchment, then drizzle some olive oil over the parchment. spread it around with a spatula (or your fingers) so that most of the parchment is covered. Shape the dough into a rough rectangle, spray lightly with oil, and cover with plastic wrap.
  7. Refrigerate overnight.
  8. Making the Herb Oil: You can do this the night you make the dough, or right before you prepare the dough for its final proofing. Heat the olive oil to about 100°F in a small saucepan, and stir in chopped herbs and garlic clove. Keep over low heat for a few minutes, stirring occasionally. Remove from heat and let cool slightly, then remove the garlic clove and discard (if you prefer, mince the garlic before adding it to the oil and leave it in. You can double the recipe if you wish, and keep the extra oil in the refrigerator.herb oil
  9. Baking the Focaccia: The next day, remove the dough from the fridge 3 hours before you’re ready to bake. Right after removing the pan from the fridge, drizzle half the herb oil over the bread, then press down with your fingers to create dimples. It’s important not to depress the entire loaf; you want to retain some of those air bubbles to get the desired texture (see below). Drizzle the rest of the herb oil over the bread, before re-covering (loosely) with plastic wrap. Let rise for 3 hours at room temperature.focaccia dough
  10. About 20-30 minutes before you want to bake the loaf, preheat the oven to 500°F.
  11. When you’re ready to bake, uncover the bread carefully. It will probably spread to cover most of the pan, but don’t worry if it doesn’t. Place the pan in the oven and turn the heat down to 450°F. Bake for 10 minutes, then rotate pan 180° and bake for another 5-10 minutes, or until lightly golden brown (I baked mine for about 7 minutes after turning).

The Best English Muffins are Fresh English Muffins

There are a few foods for which the store-bought options are perfectly adequate. Yogurt isn’t significantly better when made at home. A slice of good whole wheat bread from a bag at the store makes a perfectly nice piece of toast. No one expects a homemade hot dog on the Fourth of July. You might think that English muffins, the canvas upon which many a great breakfast dishes are built (read: Eggs Benedict, Egg McMuffins), fall into that category. After all, even top-tier restaurants often serve up the standard Thomas-brand muffins for breakfast and brunch. But don’t let yourself be lulled into mediocrity by those nooks and crannies. You are missing out on something magical.

Because once you’ve had a homemade English muffin, still warm and steamy from the oven, you’ll know that you’ve only known lackluster breakfast carbs before now. Fresh English muffins are transcendental. Life-altering. Well, breakfast-altering, anyway.

Well, breakfast-altering, anyway.


english muffins1

English muffins are unique in that they’re cooked in a pan, almost like an incredibly fat and doughy pancake. This recipe calls for finishing them in the oven, however, to ensure that they’re fully baked through the center without getting burnt on the outside. They go from nicely browned to sadly burned very quickly, so it’s important not to walk away when they’re in the pan.

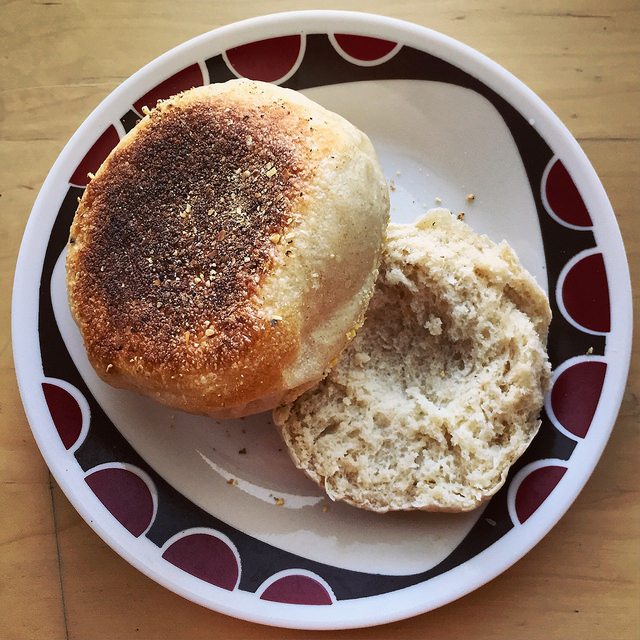
These English muffins are light and porous inside, with a nice chewy crust outside. I’ve added a bit of whole wheat flour to give them a bit more complexity of flavor, but I’d love to try packing them full with even more grains — maybe a touch of amaranth and quinoa? They’re a great base for eggs of all sorts in the morning, but I also love them toasted with a slather of peanut butter– or with a few slices of avocado topped with lemon juice and salt. But beware– once you try these, you’ll have a hard time going back to store-bought.

english muffin crumb

The Very Best, Fresh English Muffins

Yields 6 muffins. Very slightly adapted from Peter Reinhart’s The Bread Baker’s Apprentice.

Ingredients

  • 2 cups bread flour
  • 1/4 cup whole wheat flour
  • 1/2 tablespoon sugar
  • 3/4 tsp salt
  • 1 1/4 tsp instant yeast
  • 1 tablespoon unsalted butter, room temp
  • 1 cup milk or buttermilk
  • Cornmeal for dusting (at least 1/4 cup)

Procedures

  1. Stir together all dry ingredients (excluding the cornmeal) in a mixing bowl. Add in butter and 3/4 cup of the milk and stir until the ingredients form a loose ball. Add the remaining milk if the dough is too dry (it probably will be). It should be soft and pliable.
  2. Turn dough out onto a counter and knead for about 10 minutes. The dough will be very elastic and tacky, but not sticky. Form into a ball and transfer it to a lightly oiled bowl, rolling it around to coat with oil. Cover with plastic wrap.
  3. Let rise for 60-90 minutes, or until dough doubles.
  4. Line a baking sheet with parchment paper and dust with cornmeal. Turn dough onto a cutting board or counter and divide into 6 equal pieces (each one will be about 3 ounces). Shape each into a boule (smooth ball), and place a few inches apart on the parchment. Spray with cooking oil and dust with more cornmeal.english muffin dough
  5. Cover pan loosely with plastic wrap and set aside to proof for another 60-90 minutes.
  6. Preheat the oven to 350°F. Heat a pan on the stove over medium heat.
  7. Mist the pan with spray oil, and use a spatula to lift the balls into the pan one at a time, being careful not to disturb them too much as you do. (I fit 3 into my pan at a time) Let cook for 5-6 minutes, touching them as little as possible while they’re cooking. They’ll both puff and spread slightly.english muffins frying
  8. When the bottoms are a deep golden brown, flip the muffins over and cook for another 5-6 minutes on the other side. They should take on that signature hockey-puck shape after you flip them. When the second side is also deep golden brown, transfer muffins to a baking sheet and stick in the oven. Start the second batch of muffins while the first are in the oven.
  9. Bake for 5-8 minutes to ensure that muffins are cooked through. (Make sure not to wait for the second batch– they need to be baked immediately after coming out of the pan). Remove and cool on a rack for at least 30 minutes, or as long as you can wait before tearing into one.

Note: To get that craggy texture described as “nooks” by commercial English muffin brands, use a fork instead of a knife to slice these before eating; simply push the tines of the fork straight in from the side, continuing around the perimeter of the muffin, then pull apart.

muffins almost finished

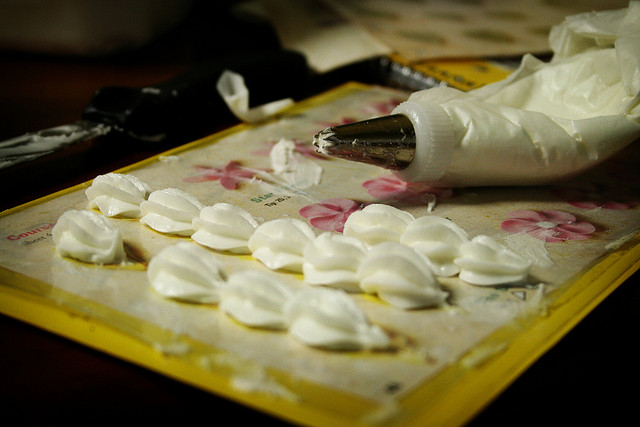
"Icing Practice" by Ginnerobot via Flickr

The Importance of Smart Practice: When Practice Doesn’t Make Perfect

Back in January, I decided to jump start my blogging and hone my kitchen skills by baking my way through Peter Reinhart’s The Bread Baker’s ApprenticeI’ve been baking bread for a long time now. Back in college my diet consisted of more peanut butter sandwiches on homemade bread than I care to remember. I love fresh, warm bread and one of my favorite childhood memories was baking big, brick-shaped loaves in a bread maker in my parents’ kitchen. The basic concept of measuring ingredients, kneading dough, then shaping and baking it isn’t a new one for me. But up until lately, my bread-making skills had been stagnant for a long time. Sure, I’ve baked a lot of loaves, but for a while noticed that my bread kept turning out more or less the same, and I didn’t see any progress towards the bakery-level quality I would like to achieve. I was practicing a lot, but I wasn’t getting any better.

Starting a weekly bread baking practice has improved my baking skills by leaps and bounds in the past few months. And while the frequency with which I bake has certainly been a factor in my improvement, there’s a more critical reason that my bread quality has improved so much lately: I’ve been practicing smarter.

A Study in Ciabatta: Why Practicing Well is Critical

I’ll admit that I’ve been baking most of Reinhart’s recipes only once each this year. While I plan to circle back to remake many of my favorites, blogging about the same recipe week in and week out would get tedious, and I’d prefer test my skills in lots of different ways this year. I also don’t want my roommates to hold a carb intervention after I serve up the same loaf of bread the 30th week in a row.

Ciabatta has been one notable exception, and it’s the perfect example of what good practice looks like. The first time I baked ciabatta, I made two loaves — one spiked with mushrooms, the other plain — and wrote a post about it. Reinhart’s ciabatta recipe is simple formula that relies on good ingredients and confident dough-handling to make a great loaf. I thought my first loaves turned out pretty well. They were soft and tasty. But they weren’t quite like the ciabatta I knew from bakeries. Check out the crumb texture here:

ciabatta crumb

There aren’t any big holes! One of the trademarks of traditional ciabatta is an open, holey texture. My bread was delicious, and would have made a great sandwich bread or burger bun, but it wasn’t quite what I had aimed for.

Trying Again: Identifying Weak Points

After my first attempt, I reviewed the recipe (Reinhart includes fantastic baking notes in his books, I’m just too much of a scrub to internalize them very well the first time around) and compared it to a few more ciabatta recipes online. A tight crumb was my main problem. I determined that I was either deflating my dough too much and pushing the air bubbles out during the shaping, or adding too much flour and making the dough too dense and stiff to develop proper bubbles in the first place. You can see how dry my first batch of dough looked:

ciabatta - folded

Notes on my shortcomings duly made, I knew what to try harder at during my next attempt. The week after I made my first ciabatta, I made another batch for a small dinner party that I cooked for. This time I tried to correct for the tight crumb of my first loaf by keeping the dough wetter during proofing. Dry dough is easier to handle, so it’s tempting to overflour and make kneading and shaping easier. I had to actively resist the temptation to do so this time. And as a result, ciabatta #2 had a much better texture in the end. Compare this wetter dough to the one above:

wet ciabatta dough

The resulting loaf was better, but still not perfect — it had more holes, but was a little too dense. I was still overhandling the dough while I was shaping it. But this was a good thing! I had correctly identified my main problems and was making progress towards correcting them. Most importantly, I knew what to do to make my bread even better.

And Again: Mastering the Technique

I had friends over for dinner a few weeks later and decided to make the ciabatta one more time. This time I let the dough stay very wet and loose. I was also extremely careful not to deflate the dough whenever I was handling it.  It was a messy, sticky ordeal, but the results were worth a bit of frustration. Finally, my bread was full of nice, big pockets!

ciabatta with holes

Cooking Beyond Your Comfort Zone

The next time I make ciabatta, I’ll keep what I’ve learned in mind and be able to replicate or even improve my last results. The biggest lesson I learned during this exercise was that I need to stop trying to confine new recipes to my cooking comfort zone. I’m more accustomed to working with stiffer, drier bread dough, so I tried to force the ciabatta dough to conform to my preferences instead of the other way around.

Let yourself be uncomfortable with your cooking endeavors. Put your faith in trustworthy recipes and tried-and-true techniques. Add a bit more butter than you think you should if your dish is turning out too dry, or throw in a little “too much” spice if it doesn’t have enough flavor.  Push each iteration of your new favorite recipe to be better than the last. Be patient, taste often, and don’t be afraid of messing up — that’s how you figure out how to make it better the next time around.

How to Practice Smarter Cooking

Practicing the same recipes over and over with the explicit intention to improve your results each time helps improve your cooking repertoire rather than just expand it. Having a library of recipes and techniques you can prepare confidently and consistently helps you gauge your progress in a measurable way, and allows you to see how all of those techniques you’ve mastered fit together into a variety of different dishes. Plus, once you’ve gotten tweaked and tested a couple of recipes to perfection, you can make them without a lot of thought, which lets you play around with variations and have more fun with them.

To get started, find three dishes that you love and resolve to cook each of them at least five times. Every time you make the dish, think about (or even better: write down) what you did well and what you could have done better. Did it look the way you expected it to look? Did it taste different from what you anticipated? The next time you make it, actively try to address at least one problem you’re having with the dish. Bit by bit, each dish will get better every time.


Featured photo by Ginnerobot via Flickr

Year of Bread: Cranberry Walnut Bread

cranberry bread ingredientsWhile I love a good piece of whole grain toast slathered with peanut butter for breakfast, there’s something to be said for stuffing your toast full of flavor before you bake it. It makes for a much easier get-out-the-door-fast kind of breakfast (or snack) that way.

the cranberry bread doughThe Dough

Here’s the thing: I dig a good, flavorful filling for bread, oftentimes they end up being very fussy during the kneading stage. By itself, this is a perfectly nice dough. It’s lightly orangey and slightly sweet, and it’s easy to handle. Without any additions at all it would make a great little twist on your average white toast bread.

But to get a good flavor dispersion, you really have to jam in a ton of cranberries and walnuts. These tend to ruin the smooth consistency of the dough, and can be hard to incorporate evenly. Chunky add-ins can make it hard to form a good crust, and just serve as an obstacle to keeping the dough in one piece until they’re set during baking.

cranberries and the dough

The Braid

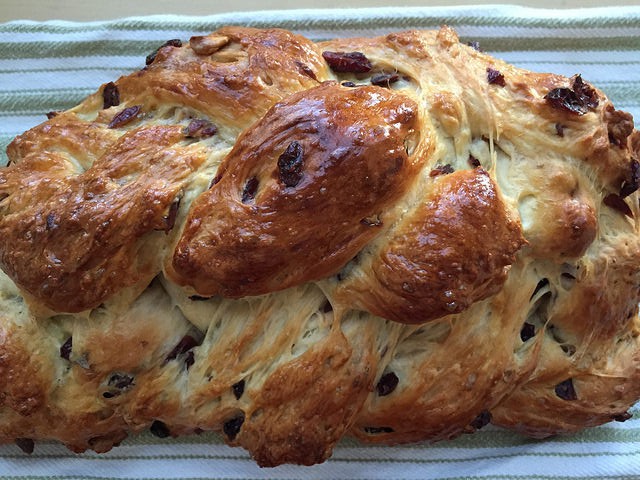
The other slightly annoying thing about this bread is Reinhart’s suggested shaping — the dramatic double braid. It’s one braid on top of the other. My first braid looked great — tight and uniform, tucked together neatly. The second, smaller braid refused to stay perched atop the big braid during the final rise, opting instead to slowly unravel and slide down the side, and forcing me to continually reposition it, trying very carefully not to deflate it. Argh.

Luckily, the final effect looked a bit more rustic and freeform than I anticipated, but still appetizing. If I make this bread again, I’ll probably stick to a single braid, or use a loaf pan, eliminating the stress of shaping and braiding altogether.

braided cranberry loaf

Mixing It Up…Next Time

But you know what I really want to try with this recipe? Incorporating the flavorings into the cornbread recipe from last week’s post, getting it even closer to being a Thanksgiving flavor menagerie. Would topping that with french fried onions be taking it too far?

This cranberry walnut bread comes together relatively quickly, and stays pretty soft and tasty for a few days. Make one on Sunday night for a Monday morning toast that’ll make your weekday breakfast a little more flavorful.

finished cranberry walnut bread

Cranberry Walnut Celebration Bread

Adapted (very slightly) from Peter Reinhart’s The Bread Baker’s Apprentice. Yields 1 large braided loaf.

Ingredients

  • 3 cups bread flour
  • 3 tablespoons granulated sugar
  • 3/4 tsp salt
  • 3 1/2 tsp instant yeast
  • 1 1/2 orange or lemon zest
  • 2 eggs, slightly beaten
  • 1/2 cup milk + 1/2 tablespoon vinegar, room temperature
  • 2 tablespoons unsalted butter, melted
  • 1/4 cup water, room temperature
  • 1 cup sweetened, dried cranberries
  • 3/4 cup coarsely chopped walnuts
  • 1 egg, whisked until frothy, for egg wash

Cranbery Walnut Bread Instructions

  1. Stir together flour, sugar, salt, yeast and zest in a large mixing bowl. Add eggs, buttermilk and butter. Stir, slowly adding water to make a soft, pliable dough.
  2. Transfer dough to a floured counter and knead for about 5 minutes. The dough should smooth and soft. Add water or flour as needed to adjust consistency. Add cranberries and knead for another 2 minutes, then add walnuts and gently knead in until evenly distributed.
    1. A method that works well for me when it comes to incorporating large chunks of ingredients such as cranberries is to start by flattening the dough out into a rough rectangle. Place a scoop of cranberries to one side of the dough, and fold the other side over. Flatten and fold a few more times, then repeat with the rest of the cranberries.
  3. Transfer to an oiled bowl and cover in plastic wrap. Let rise for 1.5-2 hours, or until dough doubles in size.
  4. Transfer to a counter and deflate slightly. Either transfer to a greased loaf pan or divide into 3 pieces and braid. Place pan or loaf on a sheet pan and brush with half of the egg wash.
  5. Proof uncovered at room temperature for about 90 minutes, or until dough nearly doubles. Brush the loaf a second time with the rest of the egg wash. Preheat the oven to 325F when you’ve got about 30 minutes left to rise.
  6. Bake for approximately 25 minutes, then rotate pan and continue baking for another 25-30 minutes. The loaf should be a deep golden brown and sound hollow when thumped on the bottom.
  7. Remove the cranberry walnut bread from the pan and transfer it to a cooling rack. Allow the loaf to cool for at least an hour before slicing and serving.

Year of Bread: Bacon Cornbread

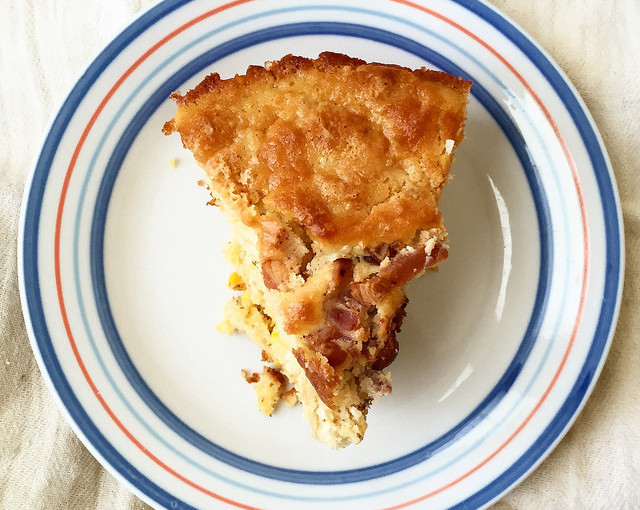
bacon cornbread sliceIf you love bacon, this bacon cornbread is your new best friend. Because — bacon! It’s arguably an ingredient that can do no wrong in the culinary pop culture. Bacon-wrapped scallops, bacon-wrapped hot dogs, bacon burgers, bacon ice cream (that one might have been a misstep)– is there no food frontier that bacon hasn’t paid a visit? In any case, this cornbread does not skimp on bacon whatsoever. Let me tell you how it goes down:

  1. Fry bacon in a skillet, reserve rendered bacon fat.
  2.  While batter is in progress, heat a healthy (haha) dose of fat in a cake pan in the oven.
  3. Pour batter over the sizzling hot bacon grease into the cake pan.
  4. You didn’t think it would end there, did you? As soon as the batter fills the pan, the bacon fat begins oozing up the sides of the pan, pooling along the edge of the batter, baking into a slightly crispy, bacony crust.
  5. Sprinkle crumbled bacon on top of batter, because any attempt at salvaging the nutritional quality of this particular cornbread died when you poured the batter directly into a pool of crackling hot bacon fat.

Reinhart’s bacon cornbread rivals his brioche recipe in terms of unrestrained, fully saturated decadence among the recipes in The Bread Baker’s Apprentice.  I would absolutely recommend this recipe to anyone tasked with bringing cornbread to a potluck or BBQ, as a way to make everyone involved hate and love you simultaneously. Even without the bacon the cornbread itself is a solid dish– dense, rich, and buttery. Realistically, this is not a bread recipe, but rather a savory sort of dessert in the brownie family. You could probably serve it for dessert with a scoop of vanilla and no one would question your decision. In the future, for non-special occasions, I’d probably reduce to just a crumble of bacon on top, and decrease the sugar and butter content overall.

17100984501_14cd8b52b3_z

Insanely Bacon Cornbread Recipe

Yield 1 (thick) 10-inch round loaf of bacon cornbread. Based on original recipe from Peter Reinhart’s The Bread Baker’s Apprentice.

Ingredients 

  • 1 cup coarse cornmeal
  • 2 cups buttermilk (or 2 cups milk – 2 T, + 2 T vinegar)
  • 8 ounces of bacon
  • 1 3/4 cups (8oz) AP flour
  • 1 1/2 Tbsp baking powder
  • 1/2 tsp baking soda
  • 1 tsp salt
  • 1/4 cup brown sugar
  • 1/4 cup sugar
  • 3 large eggs
  • 2 Tbsp honey
  • 2 Tbsp unsalted butter, melted
  • 1 1/2 cup fresh corn kernels
  • 2 Tbsp bacon fat or vegetable oil

Procedure

  1. The night before (or in the morning, if you’re baking for dinner), soak the cornmeal in the buttermilk. Cover and leave at room temperature for at least 6 hours.
  2. When you’re ready to bake, preheat the oven to 350F. Fry the bacon until crisp, then remove to a plate lined with a paper towel to cool. Reserve the fat if you are using it to grease the bread pan! Or just reserve it for other things. Fry your turkey burgers in bacon fat to make them more delicious.
  3. Combine the dry ingredients (flour, baking powder, baking soda, salt and sugars) in a mixing bowl.
  4. In a separate bowl, dissolve the honey in the melted butter, then beat in the eggs one at a time (make sure the melted butter isn’t TOO hot at this point, or you’ll cook them. Add the cornmeal-buttermilk mixture.
  5. Add the wet mixture to the dry ingredients and stir with a large spoon until batter is smooth and well-blended. Stir in the corn kernels until evenly distributed (You could also stir in some crumbled bacon at this point, if you’d like to skip the bacon topping).
  6. Place 2 Tbsp of rendered bacon fat in a 10-in round cake pan (or 9×13 baking pan), and place the pan in the oven for 5 minutes. Remove very carefully and roll the pan around a bit to make sure that the fat covers the pan and gets into any corners. If you’re not down for the bacon fat-puddle that is about to happen, skip this step and grease the pan with butter, vegetable oil, or a very thin layer of bacon fat, applied with a paper towel or pastry brush.
  7. Sprinkle crumbled bacon pieces on the top.
  8. Bake for 30-40 minutes, or until a toothpick inserted in the center comes out clean. Allow bread to cool for at least 15 minutes before slicing it into squares, wedges, or just eating it straight from the pan. bacon cornbread in pan