
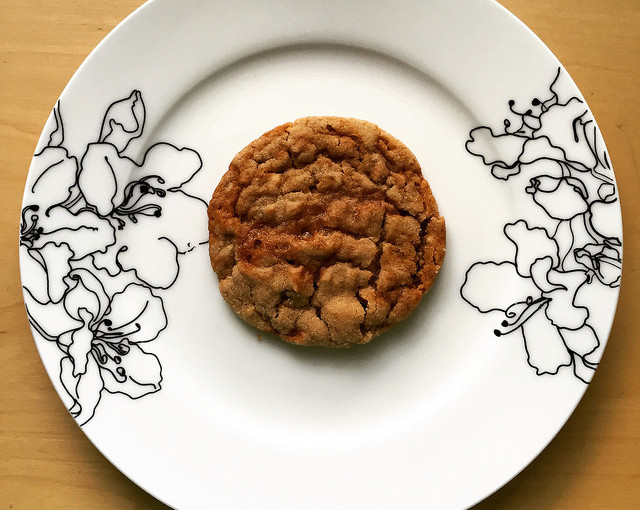
 This peanut butter caramel cookie was born out of a hunger-fueled, pre-Christmas brainstorming session. The peanut butter cookie dough is based on that of the famed New York bakery Magnolia Bakery, with the add-ins omitted to make room for the caramel swirl. If you’re not down to make your own caramel sauce (which you should, because it takes under 10 minutes and will make you feel like you have your culinary shit together), a few store-bought caramels chopped up and mixed into the dough will suffice.

Peanut Butter Caramel Cookie Recipe
Caramel sauce recipe from Smitten Kitchen. Cookie recipe adapted from Magnolia Bakery, NYC.
Ingredients
Caramel:
- 1/4 cup granulated sugar
- 2 Tablespoons unsalted butter
- 1.5 Tablespoons heavy cream
- A heavy pinch of sea salt
Cookies:
- 1 1/4 cup AP flour*
- 3/4 tsp baking soda
- 1/2 tsp baking powder
- 1/4 tsp salt
- 1/2 cup butter, softened
- 1 cup peanut butter, room temp**
- 3/4 cup sugar
- 1/2 cup brown sugar
- 1 large egg
- 1 Tbsp heavy cream
- 1 tsp vanilla
- Extra granulated sugar for rolling

Instructions

Making the Caramel
- Heat a clean, dry saucepan over medium-high heat and add granulated sugar. Stir frequently with a spatula — the sugar will slowly melt.
- When the sugar has entirely liquefied and turned golden brown, take it off heat and immediately add the butter. It’s important not to wait too long, as the sugar will keep cooking and can go from golden-delicious to brown-burnt very quickly. Whisk until butter is incorporated.
- Put back on (low) heat and add the cream and sea salt — whisk until smooth and homogeneous, then take off heat and let cool. It will stiffen up slightly as it cools, but you don’t want it to be boiling hot when you add it to the cookie dough, so this is fine. If it gets too hard to work with, you can warm it gently before adding it to the cookie dough.
Making the Cookies
- Preheat oven to 350F. In a small mixing bowl combine flour, baking powder and soda, and salt.
- In a large mixing bowl, blend together butter and peanut butter, then add sugars and blend until fluffy.
- Add egg, vanilla extract and cream. Blend until combined.
- Add dry ingredients and mix until just incorporated — I like to switch to a wooden spoon or sturdy spatula for this part.
- Drizzle caramel sauce into dough – you don’t have to use all of it, I usually use about 2/3 of a batch and reserve the rest.
- Fold the caramel into the dough, but don’t overmix- you should have nice thick ribbons of caramel running through the dough.
- You can stick the dough in the fridge for a few minutes here if you want to make it a little easier to scoop, but it isn’t entirely necessary.
- Scoop dough out in VERY heaped tablespoons (about 2 Tbsp in volume) and roll into a ball, then roll in a small bowl of granulated sugar. Move sugared dough balls to an ungreased cookie sheets. Place them at least 2 inches apart- they tend to spread a good amount. If you like, lightly press criss-crossed marks into top of cookie dough with fork tines.
- Bake for 10-12 minutes until set– don’t wait until the edges are brown, but the cookies shouldn’t look doughy in the center.
- Let cool for a few minutes, then transfer to a rack to continue cooling.
 * One of my other favorite cookie recipes uses a blend of cake flour and bread flour for a chewy yet tender consistency that was completely mind-blowing the first time I tried it. I haven’t tried that yet with these peanut butter caramel cookies, but I do love the idea of it.
**I used a jar of cheap chunky peanut butter from Trader Joe’s. Since the nuances of the peanut butter get a little lost in the sugariness of these cookies, there’s no reason to spend a whole lot of money on peanut butter. Skippy or Jif would do well too!


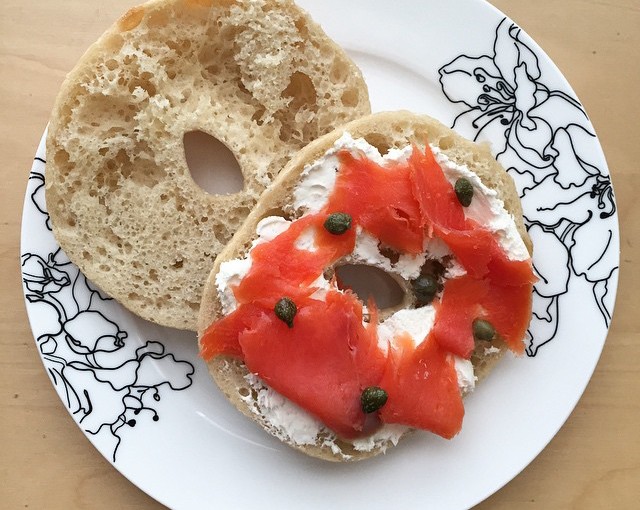


 The idea of intentionally putting dough in water is kind of weird to me. Boiling water seems so violent, and bread dough can be such a delicate substance. In the end, I find it easier to think of bagels as weird giant noodles during the boiling stage. In fact, the method used here actually has a lot in common with another favorite carb of mine: ramen. As with


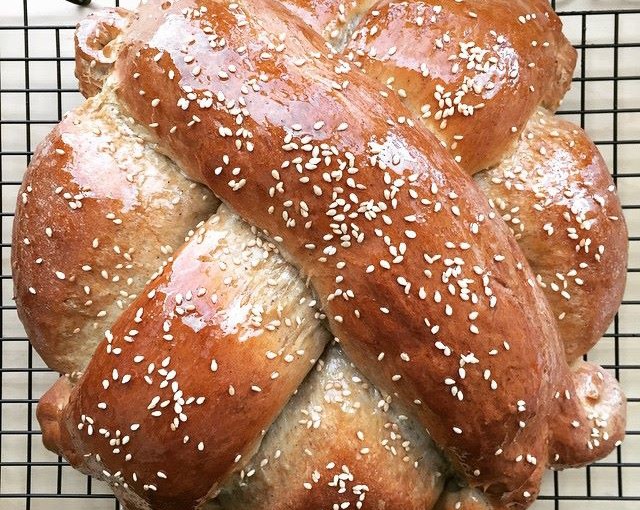

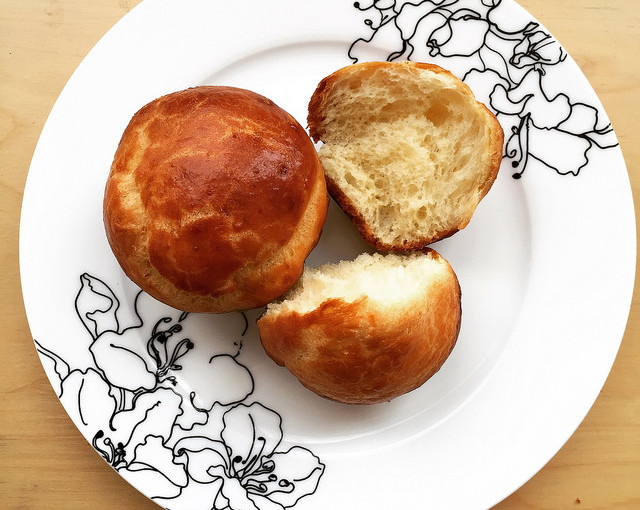
 This tsoureki is enriched with eggs, milk, oil and honey, and is generously flavored with orange rind, allspice, nutmeg, cinnamon, cloves and almond extract. It smells awesome, from the first step to the last. Other versions of this bread include more substantial additives like raisins, walnuts, dried fruit and even hard-boiled eggs, which would be interesting to try out. You can see in unbaked bread just how much spice went into this dough– it’s visibly flecked with goodness.
 After I baked the bread, I immediately gave it a wash of honey, sugar, water and orange extract (I didn’t have a bottle on-hand, so I simmered some minced orange peel with the honey mixture to give it an orangey scent and hue), as well as a sprinkling of toasted sesame seeds. The glaze does make the crust stickier than I usually like my breads to be, but the sweetness really balances out the dense, flavorful loaf well. In the future I might up the water to honey and sugar ratio to make it a little less sticky.
 This bread was really fun to make! Sometimes the ingredients in a loaf of bread can feel pretty boring, since it’s often a conduit for other foods with stronger flavors. One thing that my pictures don’t really convey is how MASSIVE this bread baked up to be– it’s impressively large and I can see how it would make a great centerpiece for a holiday meal. I’d love to try miniature versions of this style to eat as a breakfast bun or a sandwich.
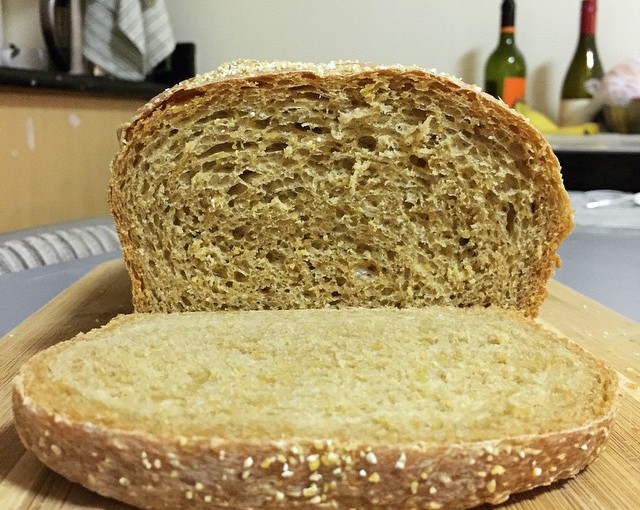

 Corn was also the bassline of my bread this week, the first alphabetically in The Bread Baker’s Apprentice. When I was a kid we used to go to the farmers’ market to buy loaves of “squaw bread,” which was dark and sweet and grainy and delicious by itself and for a sandwich. Anadama reminds me a lot of that bread — it’s lightly sweet, with a texture that just screams “please spread something on me!” …In the most PG way possible. The sweetness of the bread comes from an overnight cornmeal “soaker” and a few tablespoons of molasses, a fun ingredient that looks super cool as it rolls down the mini mountains of flour in a bowl.
